© 2026 Flywheel Co.
Development — 12.13.18
Using Insomnia (the software) to test APIs
We interact with and build APIs pretty regularly at Flywheel. Anyone who uses APIs knows that a request tool is invaluable when testing or consuming API requests. After using Postman for years I’ve made the switch over to Insomnia for the last year or so. In this post I’ll talk about some of the ways Insomnia has made my life easier.
What is Insomnia?
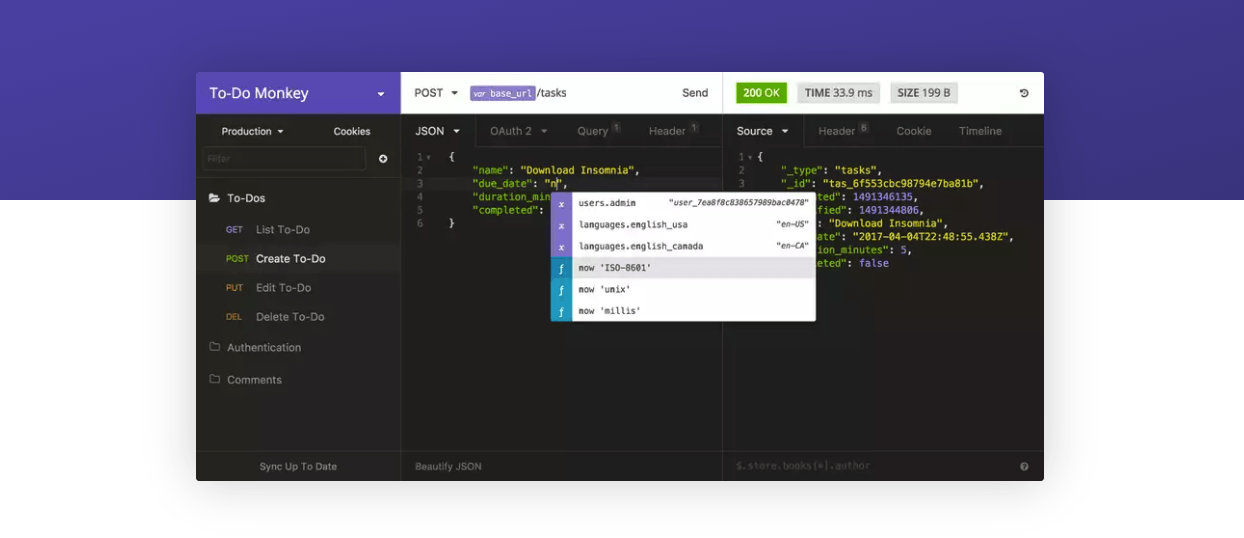
Insomnia is a REST client (get it? Insomnia... rest... I chuckled.) for debugging APIs that has an app available for Mac, Windows and Linux. If you aren’t familiar with what a REST client is, it’s essentially a way to make web based requests to a service or API endpoint. In a way, the browser you’re using right now to read this is a REST client. You are requesting this page, downloading the response from the server and doing something with that data. In a browser, that data is being displayed as HTML (for the most part). What Insomnia does is allows you to make requests and view that data directly. In most APIs you’ll also need to authenticate yourself in some fashion. Insomnia makes it incredibly easy to make API requests using whatever authentication your service might be requiring.
- Insomnia is a REST client for debugging APIs.
- It makes authentication a breeze for testing APIs.
- It’s super fast and feature rich without feeling bloated.
Creating your first workspace
Workspaces are essentially projects. Creating a new workspace is like grouping requests together as well as environment variables. Throughout this article I’ll use the API from Open Weather Map which is a free service that provides weather data. We’ll name our new workspace “Open Weather Map” so that we know what project these requests are associated with. If you don’t have an account and you want to follow along you’ll need to create a free one here.
- Workspaces are collections of requests
- Workspaces help you organize your requests into projects
Creating your first request
We’ll start with the basics first so you can get a sense of what’s going on before we dive into environments and some of the other features. Let’s kick it off by making a simple GET request for weather in Houston. The first step is creating a new request. You can do this by using the shortcut command + N or clicking the plus with the arrow next to the filter bar. Once you do, you’ll get a pop-up window to name the request and pick the request method. Let’s name this one “Get City Weather” and the request type will be GET.
Your new request is ready to define the request URL. In order to get weather data for Houston we’ll use the Open Weather Map API for Current Weather Data. The request format looks like this:
api.openweathermap.org/data/2.5/weather?q={city name},{country code}&APPID={YOUR API KEY HERE}
To make the request you’ll add the URL to the request at the top of the screen. Here’s the full URL (don’t forget to replace your API key)
api.openweathermap.org/data/2.5/weather?q=Houston,us&mode=json&units=imperial&APPID=YOUR-API-KEY-HERE
Note that I’ve added a query parameter for mode=json and units=imperial. Click send. If all has gone to plan you should see something like this in the response panel. (I’ve abbreviated the response)
{
	"coord": {
		"lon": -95.37,
		"lat": 29.76
	},
	"weather": [
		{
			"id": 800,
			"main": "Clear",
			"description": "clear sky",
			"icon": "01d"
		}
	],
	"base": "stations",
	"main": {
		"temp": 59.97,
		"pressure": 1028,
		"humidity": 31,
		"temp_min": 57.92,
		"temp_max": 62.6
	}
}
Nice! Now that you know how to create requests and get results, let’s move into environment variables.
Cleaning up requests with environment variables
Environment variables are incredibly useful when testing APIs. One quick example would be the base URL of your requests. Rather than typing http://api.openweathermap.org/data/2.5/ for every single request we can assign a variable for that. This gives you a way to keep reused strings in a variable that you can use in your requests. Another example would be a bearer authentication token or a user id.
- Environments allow you to store reusable bits of data in variables that you can use in your requests.
- Environment variables are any valid JSON value like String, Int, Boolean.
Creating an environment
To create your first environment just look to the top left of the insomnia screen just under the title of your workspace. You’ll see “No Environment” with a dropdown arrow. (This is assuming you haven’t already set up an environment… If you have, you can skip ahead). Click on that dropdown and select “Manage Environments”. For those of you that prefer keyboard shortcuts it’s command + e.
You’ll notice that there is a “Base Environment” and “Sub Environments”. The base environment includes variables that are available to every environment in that workspace. Sub environments are variables that are only available when you have the sub environment selected. We’ll get into sub environments in a bit. For now, let’s create our first environment variables. We’ll start off with baseUrl and apiKey variables to get things moving. The way Insomnia stores these environment variables is in a JSON object. If you’re familiar with that all you’ll need to do is drop-in JSON that looks like this.
{
	"baseUrl" : "http://api.openweathermap.org/data/2.5/",
	"apiKey" : "YOUR-API-KEY-HERE"
}
Click “done” and we’ve successfully created our environment variables for use in our API requests.
Using your environment variables
Using the variables you set up for you environment is as easy as can be. Let’s create a new request and name it Get City Weather 2. Insomnia makes adding environment variables to your request a breeze. All you need to do is type the name of your variable and wait for the dropdown to display. In your request URL, instead of typing in the full URL let’s use our request variable and type in baseUrl instead. You should quickly see a dropdown menu of variables that match the one you’ve typed in. Click on that or use the arrow keys and enter to convert your string to an environment variable. Much cleaner, right? The added benefit here is both that it’s a much cleaner look but also that if you ever need to change your API base URL you can change that in one spot. For example, let’s say Open Weather Map decides to update their API to 3.0. All we would need to do is update the baseUrl environment variable and it will update all of our requests.
- To use environment variables just type the name of the variable in your request and wait for the dropdown.
- If your variables ever change you only need to make the edit in one spot for all of your requests.
Sub Environments
“But Matt, why would I want sub environments? What good does that do me?”. I am so glad I asked myself.
In some API’s you could have different environments for different regions. We’ll continue on with our Open Weather Map example. Let’s say you would like to store environment variables for requests in the US and requests in the UK. One obvious change is the temperature units. Here in the states we use Fahrenheit. In the UK and just about everywhere else in the world Celsius is used. We can easily create a sub environment to switch over from Fahrenheit to Celsius without having to manually change our environment variables.
Let’s create a sub environment by following nearly the same instructions as the base environment. Use the shortcut command + e to jump back into the environment manager. From this screen you’ll see your base environment and have the option to add a new sub environment. We’ll create two sub environments. The first we’ll name “Metric System” and we’ll add this JSON to create a sub environment variable.
{
	"units": "celsius"
}
The second sub environment we’ll call “Imperial System” and we’ll add this JSON to it.
{
	"units": "imperial"
}
We’re all set! Now the easy part. Go back to your Get City Weather 2 request and we’ll update the units=imperial with our new units environment variable. First let’s select the sub environment in the left panel of the Insomnia UI. Now we can change our units query parameter value with our new variable. Just replace imperial with units, wait for the dropdown and select the correct variable.
With this finished all you need to do to switch from imperial to celsius is simply change your sub environments. Easy, right? You can see how being able to set sub environment variables can speed up your work. Imagine you needed to provide a user ID in your request. Sub environments are a great way to change user IDs or specific settings.
- Sub environments let you define variables that you can change based on the set environment.
- Sub environments share environment variables with your base environment.
Insomnia is an invaluable tool for API developers
I’ve only scratched the surface of what Insomnia is capable of. There is so much more available to developers that it would be a novel to cover in a single blog post. This should get you started down the path of learning about Insomnia and getting as much benefit out of it as possible. Some of the key features that I didn’t mention here are :
- Import and Export workspaces to share with co-workers.
- Multiple API authorization options.
- User Interface themes (that are actually nice)
- Simple proxy settings.
- Paid version that allows you to sync data across devices or with your team.
- Write your own documentation for requests.
- Request round-trip timeline.
- Much more.

Co-founder & Lead Programmer
Matt Higgins
Matt is a co-founder, creative director, and programmer at Flywheel. He's made literally tens of people laugh in his lifetime and is always looking for the next problem to solve.
TOP