© 2026 Flywheel Co.
Photography — 09.21.18
How We Use Lightroom to Cull, Sort, and Rate Our Photo Shoots
It is always exciting when our clients save room in their budgets for creating custom photography assets. Authentic imagery sets the proper tone for any organization's brand touchpoints. When we do photo shoots, we capture anywhere from a hundred to a thousand photos to review, edit, and archive. With that many photos, it can be easy to get lost in a sea of files. Here's how we use Adobe Lightroom to stay organized.
Importing Photos Into Adobe Lightroom Using Custom Presets
If you've got a digital camera and Lightroom, chances are pretty high that you know how to transfer images from one to the other. But if you find yourself making the same exact adjustments to all of your photos (e.g. clarity, base sharpening, lens corrections, etc.), you should look into creating a custom preset that can be applied during import. NOTE: Be subtle when creating this import preset. These settings should be restricted to edits that will work on ALL of your photos. This is just your default staring point, so less is more.
Below are the settings I'm currently using in my "Apply During Import" preset.

You can see I'm applying very subtle adjustments (updating the Color Profile to match the color profile I use in-camera, a little bit of Clarity & Vibrance, a slight adjustment to the Tone Curve to add a little contrast, some Sharpening, Lens Corrections, and a subtle Vignette because I like to draw the eye into the photograph).
How to Create a Custom Preset
First, you'll need a RAW file (always shoot in RAW). In Lightroom, switch into the Develop Module by selecting a photo and pressing D on the keyboard. Make sure there aren't any adjustments on the photo by resetting it: Right-click the photo in the film strip > Develop Settings > Reset.
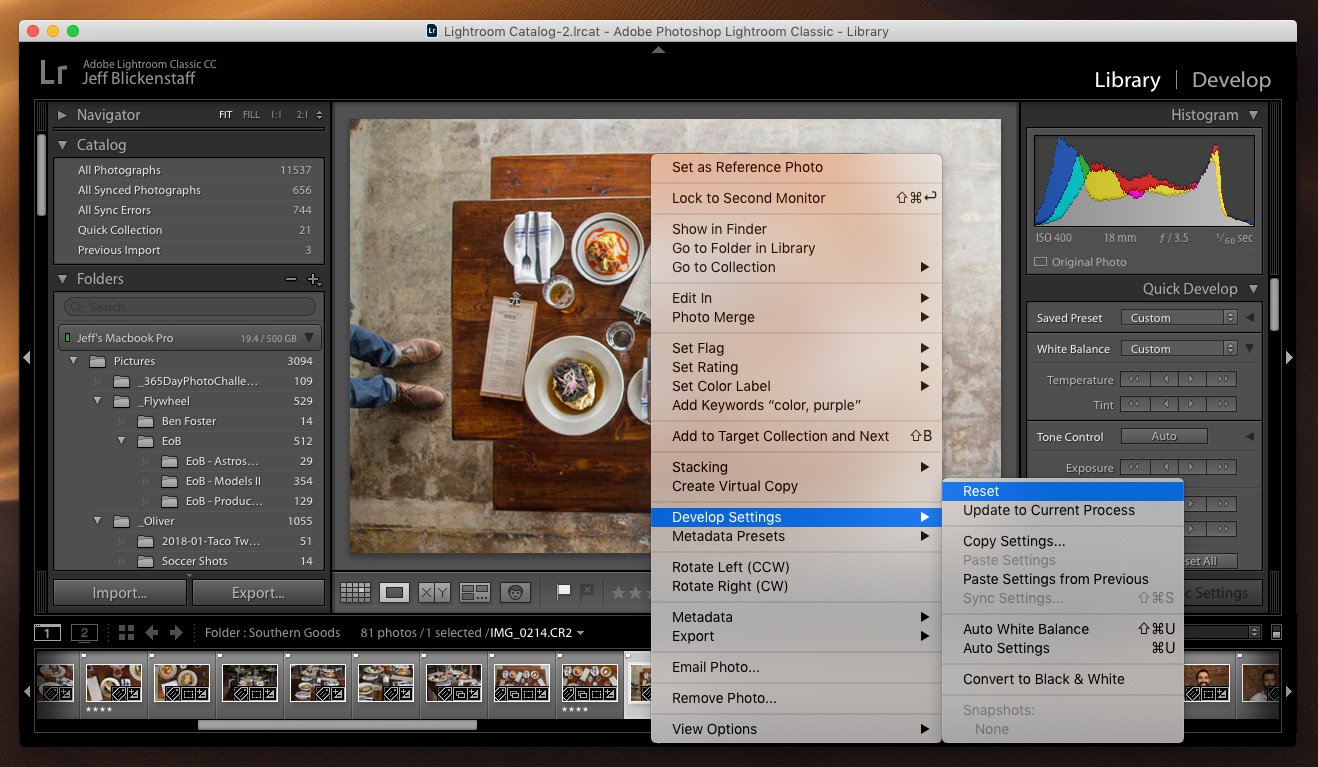
This ensures you're working with a clean RAW file. Make your base edits to this photo. Once you're ready to save the preset, click the Add new Presets button in the left column of the Develop Module, then click Create Preset.... You'll need to name the Preset as well as tell Lightroom which Group to save the preset to. You'll also need specify which Settings to include in the Preset using the checkboxes.

Awesome, Preset created, let's movie on.
Initial Culling: "Flag" vs "Reject" in Lightroom
Great! All of your photos are now imported. It's time to start organizing. My goal is to look through all the photos quickly and make a snap judgement about each photo's potential. This is where Lightroom's flagging system comes in handy. There are just three keyboard shortcuts you need to know:
-
P= Flag (think of this asPfor "pick") -
U= Unflag (all photos are imported Unflagged by default) -
X= Reject (think of this asXfor "delete later")
I try not to overthink things too much during this stage. If a photo "speaks to me," I Flag it ( P ). If I missed focus, the composition is off, or someone is blinking, I Reject it ( X ). If I don't have strong feelings for it one way or the other, I simply move on to the next image, leaving it Unflagged. If you change your mind about Flagging or Rejecting an image, press U to Unflag it.
Filter by Flags to See Only the Photos You Want
Now that you're done with your initial culling, you can filter the images to see only the photos you Flagged. To do this:
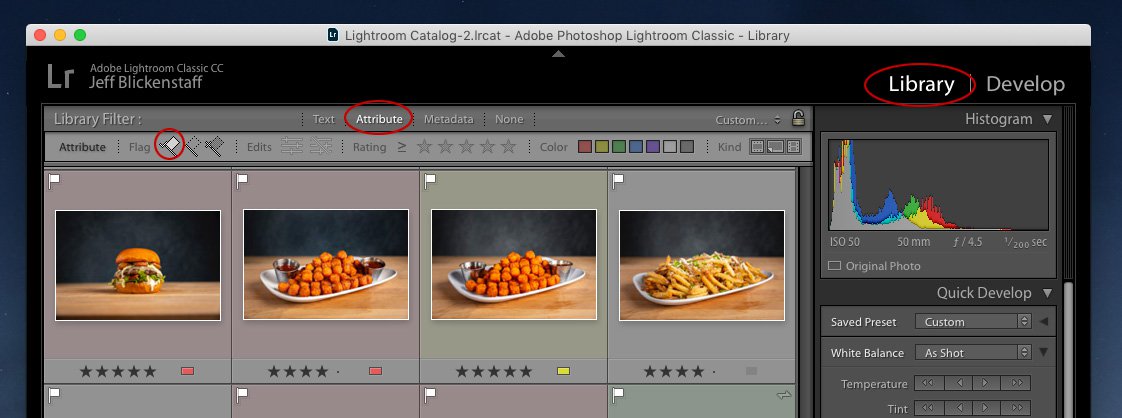
- Make sure you're in the Library module (
G) - Show the Filter Bar by clicking
Menu > View > Show Filter Baror by simply pressing\to toggle it on/off - Check that
Attributein the Filter Bar is selected - Click the appropriate Flag icon, in this case, we want to see all Flagged images
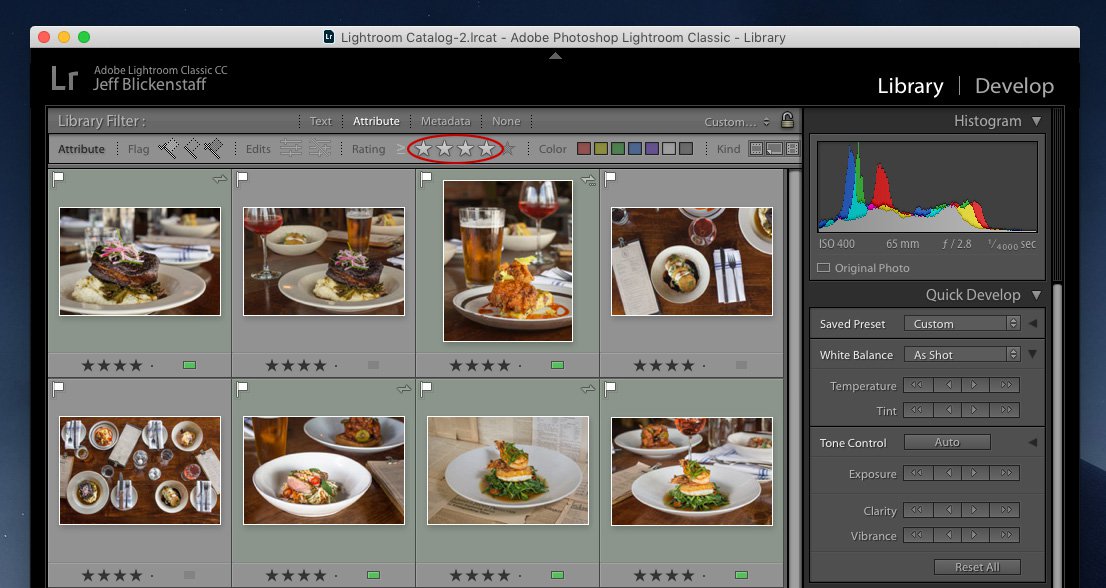
Second Culling: Making Use of Star Ratings in Adobe Lightroom
Now that we've got our initial selects made, it's time to move on to what I call the "Second Culling." With this round, we get a bit more critical about which photos we intend to edit. Here is where I use Lightroom's Star Ratings. You can assign anywhere from 1 to 5 Stars. I personally haven't found much use for Stars 1-3, but I do use 4 and 5 Star ratings. In my workflow, 5 Stars is an obvious winner. I will assign 4 Stars if I think an image has enough potential to warrant spending 2 or 3 minutes on a quick edit to determine if it's a keeper. The Bottom Line: Only 4 and 5 Star images will be edited.
Tip: You can use your keyboard to quickly assign Star Ratings:
-
1= 1 Star -
2= 2 Star -
3= 3 Star -
4= 4 Star -
5= 5 Star -
0= 0 Stars
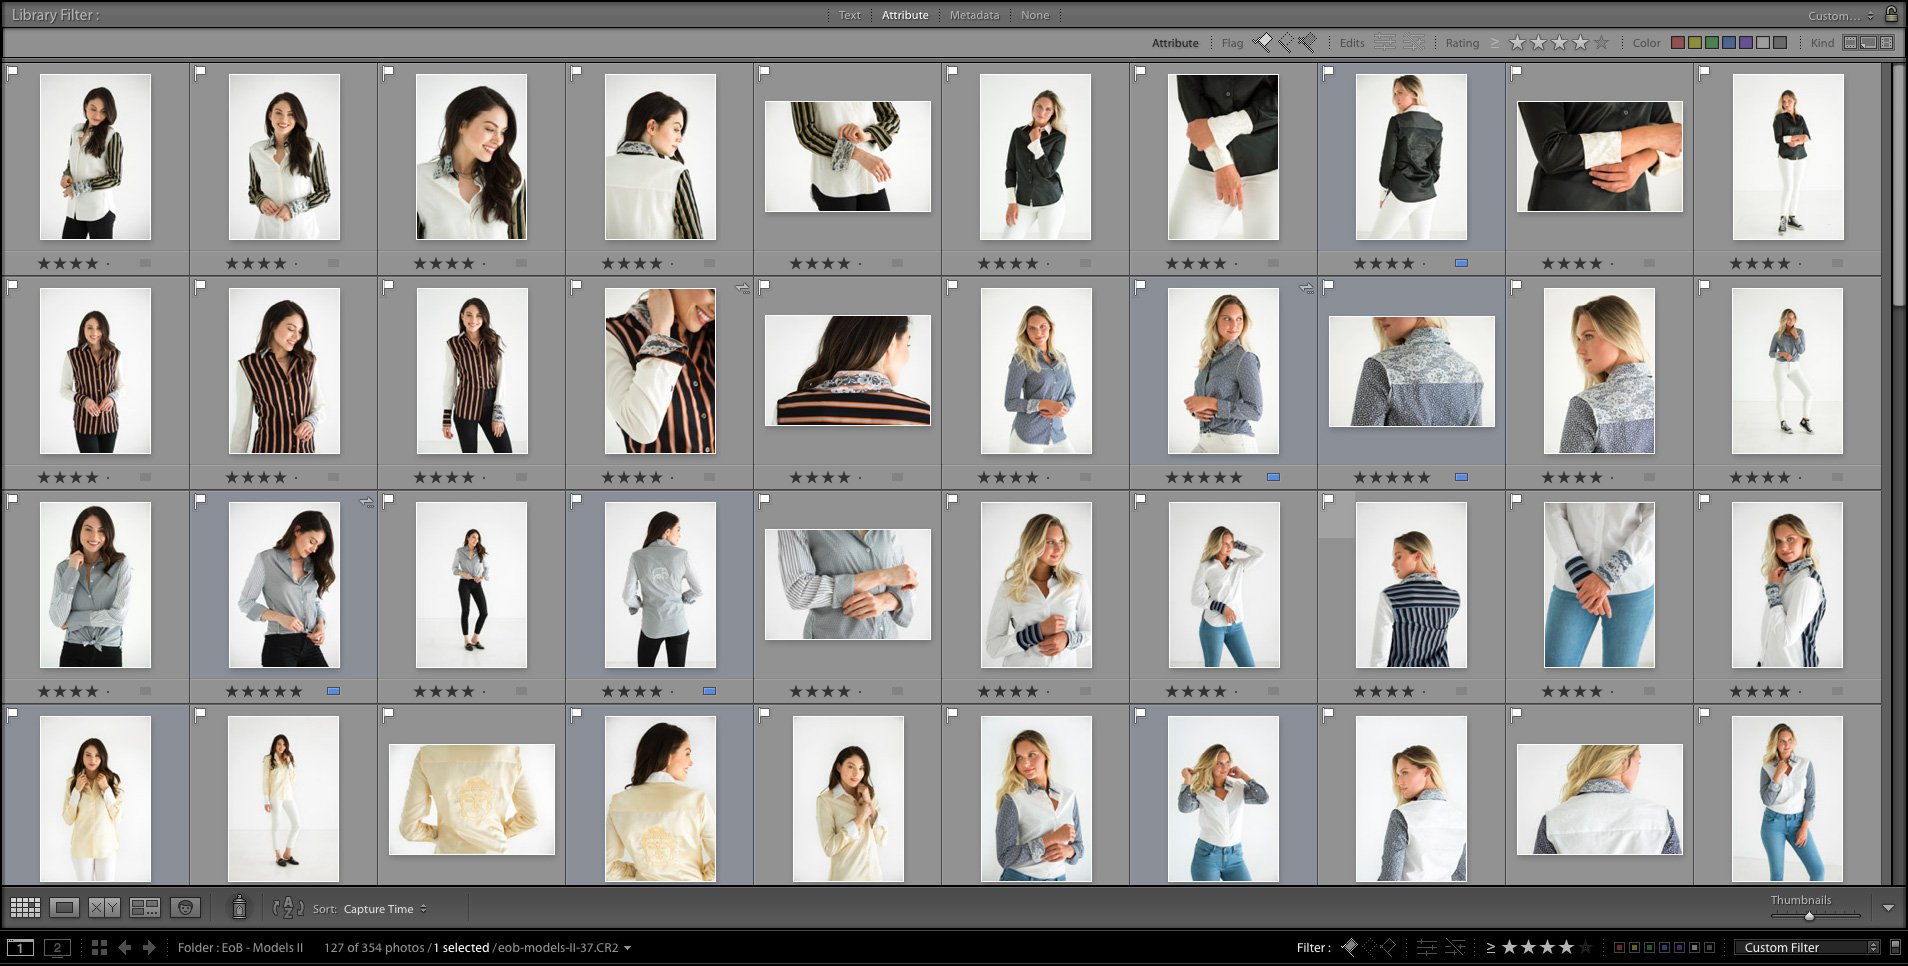
Again, you can use the Filter Bar to only display 4 and 5 Star images, so make sure you've done that before moving on to the next step. NOTE: If you filter by 4 Star, Lightroom will display all images that are 4 Stars or higher.
Final Selects: Using Color Labels In Lightroom Classic
Sometimes Star Ratings are enough to determine your final selects, so depending on how many photos you end up with in your session, this step is optional. If you're left with hundreds of photos that are 4+ Stars, you should consider further organizing your images with the use of Lightroom's Color Labels.
Lightroom offers 5 different Color Labels. You can use these labels however you like. Just like the Star Ratings, you can use keyboard shortcuts to assign (most of) the Color Labels too!
-
6= Red -
7= Yellow -
8= Green -
9= Blue - Sorry Purple, no keyboard shortcut for you, you lousy sonnofa ...
How I Personally Use Color Labels In Lightroom
I use Color Labels to mark my absolute, all-time, hands-down, cream of the (... you get the idea) very best photos only. Photos I intend to spend extra time editing for 1.) client delivery, 2.) posting on social media, or 3.) the portfolio. I take photos professionally and personally, so I use the Color Labels to differentiate between the two:
-
Green- Client Photos -
Blue- Personal Nature Photos -
Yellow- Personal People Photos (friends & family)
I haven't yet found a use for the Red and Blue labels.
Other Uses I've Seen for Color Labels In Lightroom:
- To label multiple images to be used for HDR stacking, focus stacking, or time lapse
- To label images that need to be edited
- To label images that have been edited
- To label images to post to social media
- To label images taken by different cameras and/or lenses
Get creative, the Color Labels are your oyster!
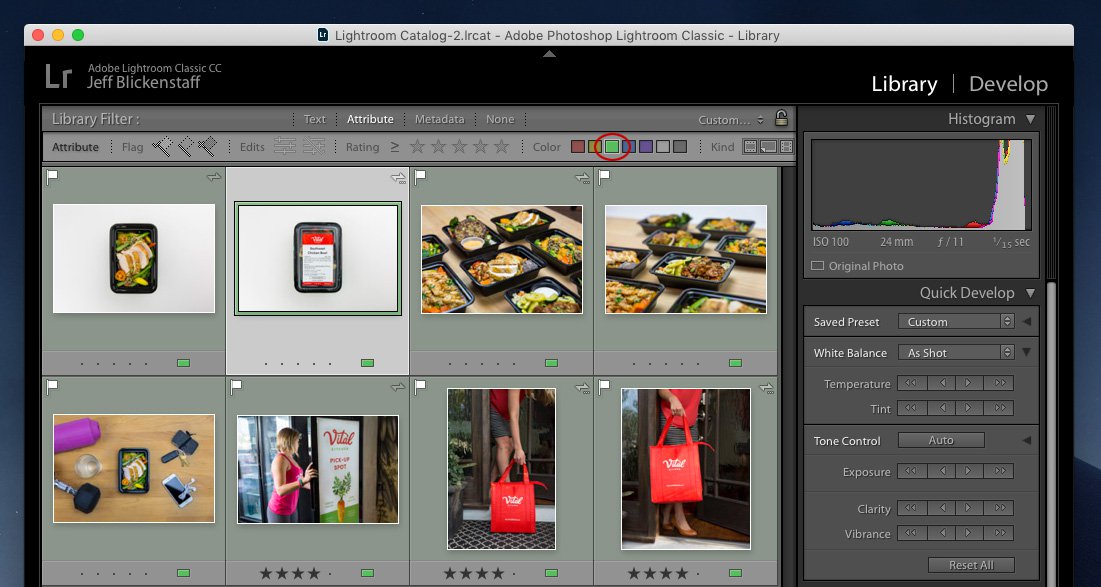
Filtering Based On Color Labels
You can filter with Color Labels much like you can with the Flags and Stars, simply click the Color Label you want to see from the Filter Bar. Keep in mind that you can click multiple colors.
File Cleanup: Deleting Rejected Images & Bulk File Renaming In Lightroom
Your session has been shot, imported, flagged, rated, and colored. So we're done, right? Alllllmost.
Deleting Your "Rejected" Images
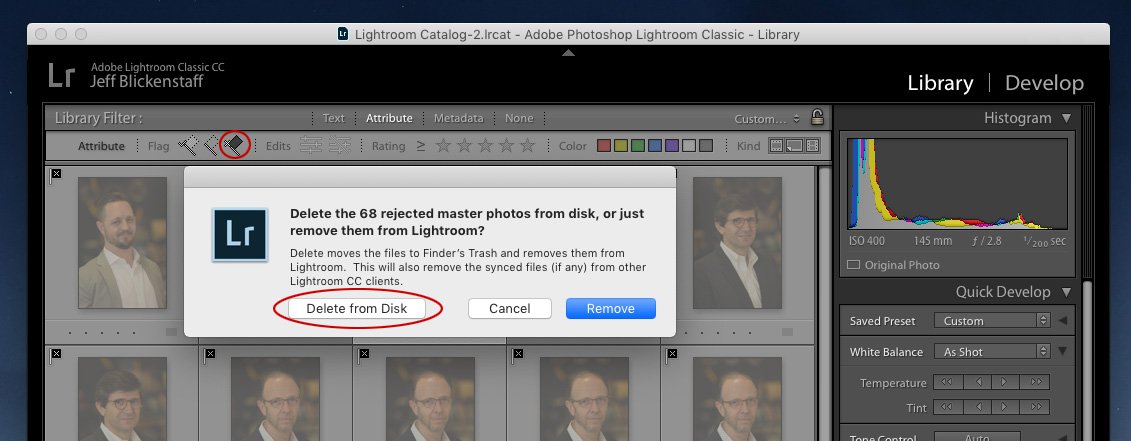
Remember those images we flagged as "Rejected" in our initial culling. There is no reason to have those files clogging up the hard drive. Let's filter to see them all at once. Click the "Rejected" Flag icon in the Filter Bar. Then click Menu > Photo > Delete Rejected Photos or better yet, use the keyboard shortcut ⌘+DELETE (Mac) or CTRL+BACKSPACE (Windows).
In the dialogue box that pops up, you'll want to choose Delete from Disk, this will delete the images from your hard drive. Choosing Remove just removes the images from your Lightroom catalog, but the original image file remains on your hard drive.
Bulk File Renaming in Adobe Lightroom
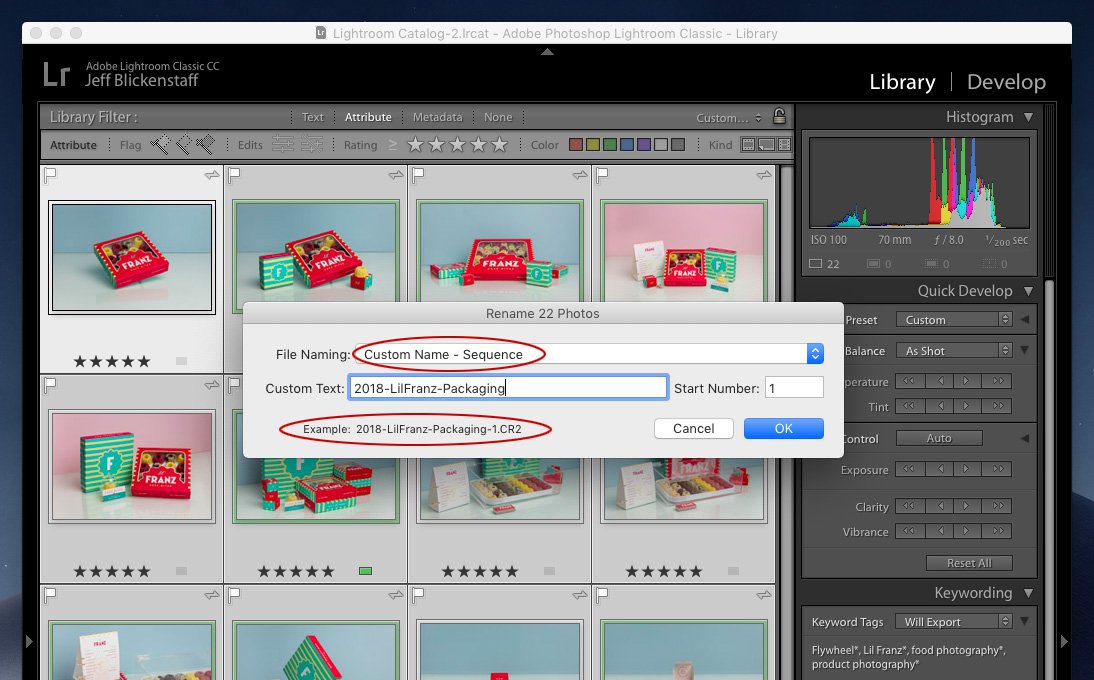
Now that we've cleared out all the clutter from your session, let's rename the files so that when your client receives your images, they see something like 2018-ClientName-Session.jpg instead of 029A5379.JPG or DSC_90210.NEF.
Bulk Renaming is simple. Switch to the Library Module ( G ), select all the images you'd like to rename by typing ⌘+A (Mac) or CTRL+A (Windows), then click Menu > Library > Rename Photos... or just use the keyboard shortcut F2.
From the dropdown menu, change File Naming to "Custom Name - Sequence". This will add -1, -2, -3 after the filename you choose.
Conclusion: Bringing It All Together to Quickly Find the Image You're Looking For in Adobe Lightroom
Now we can call the work done (easy enough considering we skipped the editing process entirely).
- We "Flagged" all of our initial favorites
- We "Rejected" and deleted all the unusable images
- We used the Star Rating system to prioritize our favorites
- We used Color Labels in creative ways to further categorize our images
- And we renamed our keepers, so that we're delivering clean filenames to our clients
Now it's time to reap the rewards of our efforts. Actually, later is the time for reward reaping. When I revisit a session in Lightroom a month, 5 months, a year after the shoot, I know exactly which images are my favorites.
I just filter the session to only display my 5 Star images that I've also labled Green
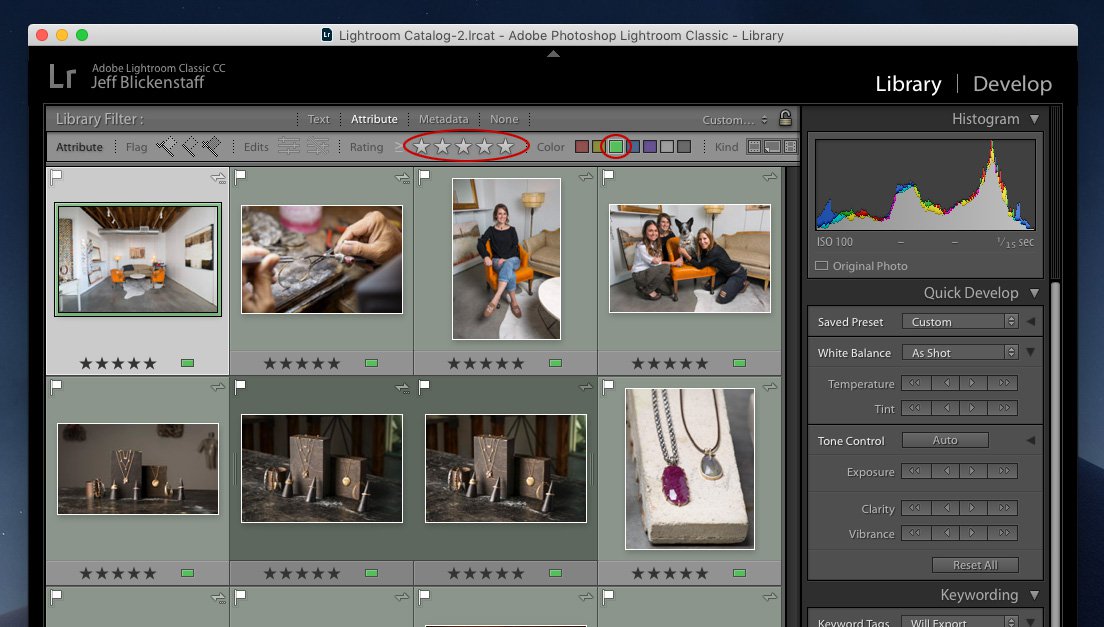
There you have it, that's how we stay organized in Adobe Lightroom.
TOP